
How to grow plants from seeds: step by step
In general, the smaller the seed, the shallower you should sow. Tiny seeds can even be scattered on the surface of soil to germinate.
Sowing too deep can prevent germination, causing seeds to go dormant.
Step one: sowing
Thoroughly clean reused containers to avoid contamination from diseases or pests.
Even when growing indoors, follow planting timelines – healthy seedlings can still be killed by low temperatures.
Sowing process
- Choose and weed the sowing area, or fill a container with growing medium
- Water the area well until damp throughout
- Scatter or sow in drills when sowing outside; sow individually in small containers, or spaced evenly apart, in large ones
- Cover seeds with a light layer of growing medium or leave on the surface
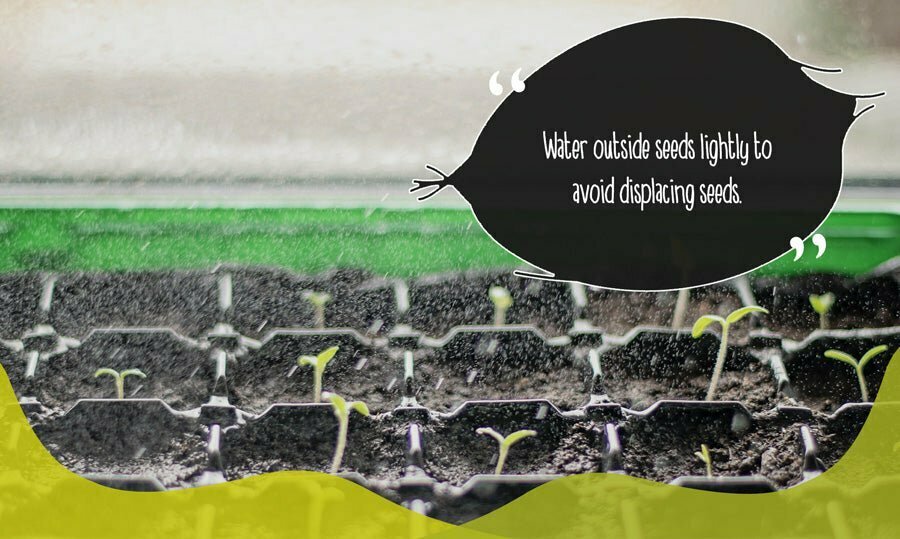
- Water outside seeds lightly with a fine watering can head to avoid displacement. Cover inside seeds with a clear material, like glass, to seal in moisture and allow light through.
Indoor growing
Sheltering indoors allows for sowing earlier in the season. Heated greenhouses or well-lit spacious rooms make it possible for some to be sown as early as January.
Most are sown in February or March for planting out in May or June, after frost.
A clear cover over germinating seeds should retain moisture and warmth. If the soil seems dry, water from the bottom via a drip tray.
Watering from above can dislodge seeds and compact soil. Watering from below preserves the soil structure and encourages roots to grow.
Outdoor growing
Before the growing season starts, cultivate the soil by layering compost or organic matter on top. This produces healthy, nutrient-rich soil with good aeration and drainage.
Soil type may affect when to sow: light soil warms faster; heavy, waterlogged soil can take longer.
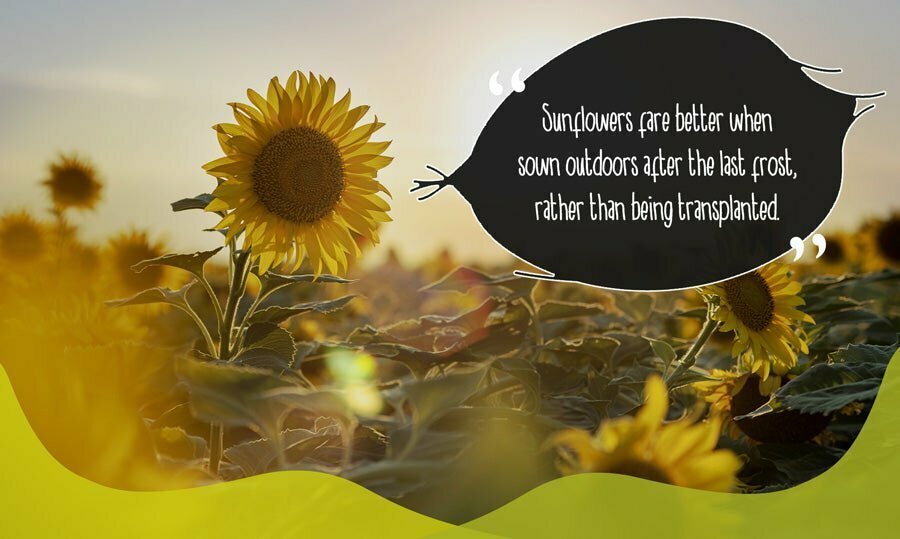
Some plants, such as lettuce, cucumbers, melons and sunflowers, fare better when sown outdoors after the last frost, rather than being transplanted.
Horticultural fleece, or similar removable insulation, can protect germinating seeds without stifling growth.
Sowing in drills helps to arrange flowers and vegetables. Dig a shallow trench in the desired pattern, space seeds accordingly at the bottom, cover with soil and lightly pat down.
‘Scattering’ creates a wilder look, suited to wildflowers or cottage gardens. Be aware that thinning out may be required after germination.
Step two: germination
Germination usually takes three to six weeks. However, it can take up to 15 weeks for some plants.
The first true leaves indicate that germination is complete. Many plants grow a set of small, light leaves called cotyledon before their first true leaves.
Once indoor seeds have germinated, remove the clear cover to allow airflow. Move the seedlings to a location where they will receive lots of direct sunlight, and turn regularly to promote even growth.
Keep the soil damp, without flooding new plants, and ensure soil temperature remains warm and steady.
You’ll need to monitor outdoor plants in case they need to be thinned out (to reduce competition) and for problems caused by bad weather or pests.
Step three: planting out
Transplanting smaller seedlings
Smaller seeds can be ‘pricked out’ from shallow starter pots before full germination, to provide room for growth. Loosen soil around the roots with a blunt stick, and then lift gently by the first set of true leaves. Keep as much soil around the roots as possible to prevent transplant shock.
Once the roots of larger seedlings have filled their containers, and smaller seedlings have germinated fully, they’re ready for planting out.
If you are intending to grow plants indoors, they can be transplanted into containers large enough for healthy adult root systems and grown from there.
Hardening off
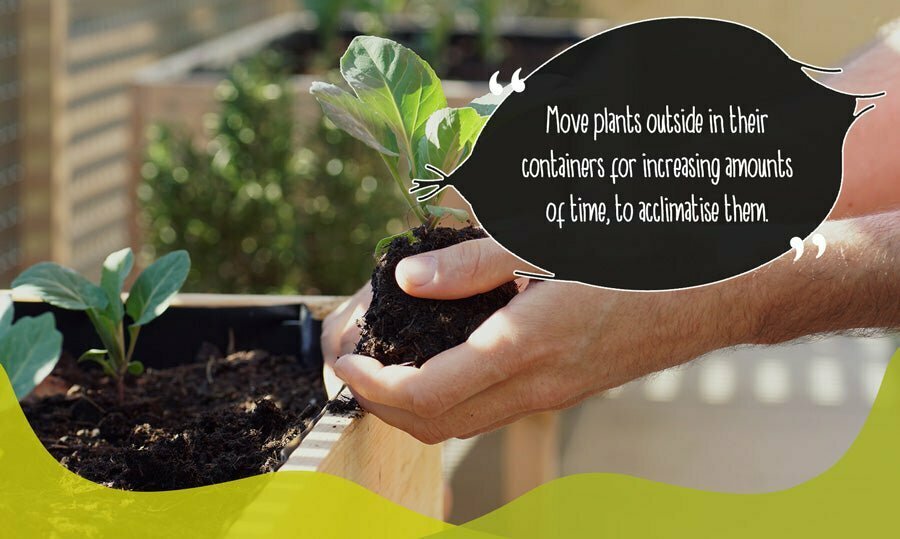
Plants heading outside will need to undergo hardening off.
Move plants outside in their containers for increasing amounts of time, to acclimatise them to a less controlled environment.
At this stage, you should water less frequently, but in higher volumes. Regular, light watering encourages the formation of weaker root systems. Watering from the bottom, or flooding a couple of times a week, encourages deeper, stronger roots.
Step four: maintenance and aftercare
Once seeds have grown into adult plants, they need less attention. However, they still require monitoring for signs of deficiency.
Pruning, controlling competition from surrounding plants, and preparing for adverse weather can prolong the life of your plants. Move containers or pot plants to shelter or indoors during storms or cold snaps.
Mulch or chips can be used for insulation once plants have germinated. This protects against extreme temperature changes or rainfall.
Coco coir for healthy seed growth
Coco dot seed starter pellets are perfect for starting seeds. Containing all the benefits of coco coir, they’re water retentive, naturally sterile, and offer excellent drainage and aeration.
Once the seeds have germinated, coco dots can be transplanted with seedlings directly into pots or beds.
Coco coir’s fine structure makes germination easier on smaller plants. Superior aeration and drainage mean enough water is provided while avoiding rot.
At Coco & Coir, we take pride in supplying hard-working gardeners with the right growing mediums for successful planting projects. Our online store contains a range of peat-free coco coir products to get you started, including coco dots and coco chips.
In addition, our extensive blog archive contains a trove of hints and tips to aid growing success.


