
The best growing medium for microgreens
Microgreens can add colour, texture, taste and vitamins to mealtimes all year round. You can grow them in the smallest living spaces with just water, a growing medium, and sunlight.
What are microgreens?
Microgreens are green vegetables. But they’re harvested without their roots before maturing. They often contain higher levels of vitamins and nutrients than mature specimens of the same plant. And as they’re smaller, they have a stronger flavour.
You know that sprig of green on a plate in a fancy restaurant? Chances are it’s a microgreen. Examples include:
• Watercress
• Radish
• Garlic
• Beet
• Melon
• Cucumber
For more taste inspiration, check out The Chef’s Garden® Miracles Of Microgreens article.
What about nutrients?
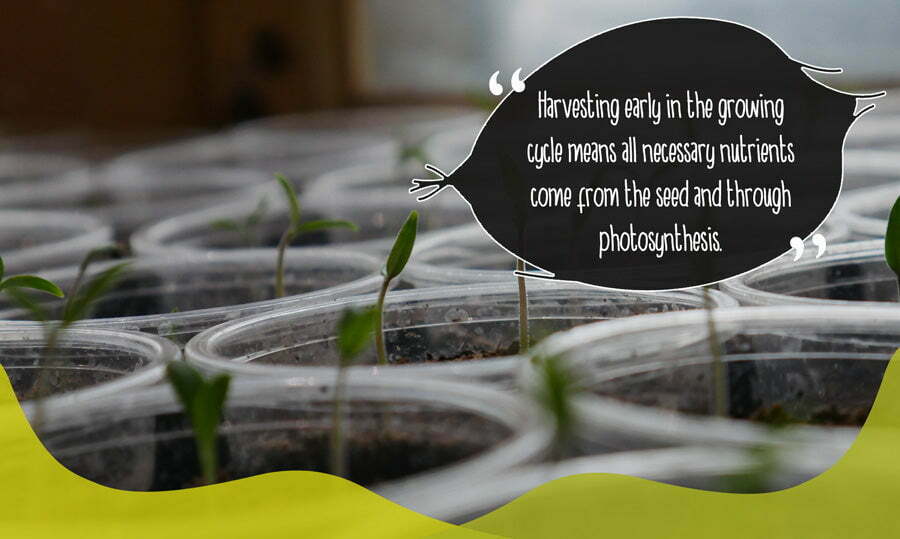
When you grow microgreens, you don’t need to add nutrients. This is because you’re harvesting early in the growing cycle. The plant hasn’t had to develop flowers, tall shoots, large leaves or long roots or tubers. So all the necessary nutrients can come from the seed and through photosynthesis.
Growing mediums for microgreens
A substrate should do three things:
- provide a supply of water, air, and nutrients to roots
- physically support the plant
- allow maximum root growth
Soil
Soil is used because of the ease with which it can be acquired and used.
Most gardeners are comfortable using soil. It is naturally organic, offers predictable and consistent results, and retains moisture.
Most microgreens need only soil and water. Some brightly coloured plants, such as radish, may need added nutrients to flourish.
While soil is cheap to buy, be sure to go peat-free to protect the environment.
The downside of soil is the potential for mess, and inconvenient, bulky bags in small spaces. Soil is also prone to mould growth, which can lead to plant diseases and root rot.
Sterilised soil
Sterilised soil has been chemically- or temperature-treated to kill diseases, seeds, or pests. This minimises the chance of damping off and mould growth, making it better for growing seeds indoors. Small batches can be sterilised at home by baking in the oven at 180 degrees for 30 minutes.
Hemp mats
Hemp growing mats are natural, compostable and have a neutral pH. The woven hemp fibre is water retentive and distributes water evenly, promoting healthier germination. Mats provide a good mixture of air and water for young plants.
The lack of mess and ease of cleaning once finished make for a great indoor growing medium. However, hemp mats are flimsy and easy to rip once wet. This makes them hard to transfer or reuse. They can also be tricky to source.
Vermiculite
Vermiculite is a heat-expanded mineral mixed into soil or used as a growing medium. Providing excellent aeration, it minimises rot and damp for healthy root growth.
Some other key benefits:
- holds moisture and nutrients well
- mould-resistant
- sterile
- pH neutral
- contains minerals such as magnesium and calcium.
However vermiculite still has a loose structure which, after watering, can easily be displaced. This can result in compacting and loss of vital air pockets if moved or bumped. Find out more in our perlite vs vermiculite article.
Coco coir for microgreens
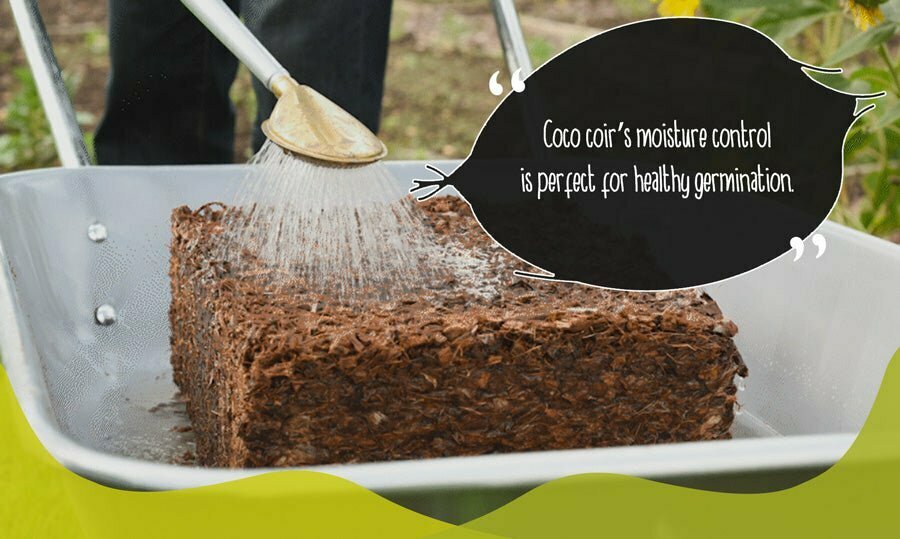
Coco coir is made from coconut husks. It’s naturally sterile, offering the benefits of sterilised soil without any processing.
Both water retentive and porous, coco coir offers the perfect level of moisture control for healthy germination. Coco coir can get a little messy, but it still leaves less residue than soil.
Coir comes in small, lightweight dehydrated bricks, like our Coco Grow blend. This makes it easy to store in small spaces, when compared with soil. It can be consistently reused, as long as there are no harboured diseases or pests.
Soil vs hydroponics
Hydroponic projects are easier to set up, requiring only a tray, water, and seeds to start. However, more water is needed compared with soil as they dry out faster.
Mats are easier to dispose of or compost. They take up less space than soil but can only be used once. Every root and trace of harvested greens needs to be removed before reuse, which is almost impossible.
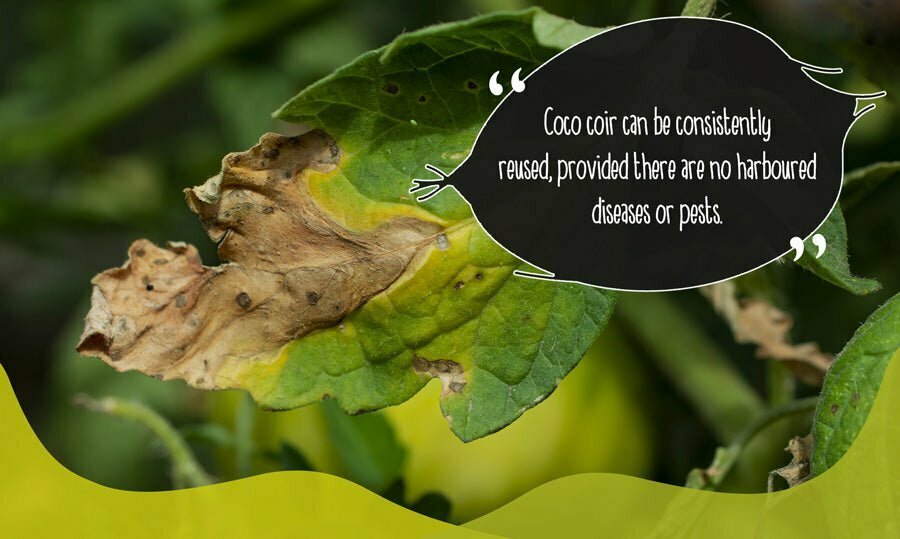
Soil, and substitutes like coco coir, can be consistently reused provided there are no harboured diseases or pests.
Larger seeds grow better in soil than in a hydroponic system. Most seeds will generate a higher yield in a good soil mix than when grown hydroponically.
Assessing the options for a growing project
Which growing medium you choose will depend on desired results.
If cleanliness is paramount, hydroponic mediums like hemp mats or coco fibre will be better.
For a reusable medium, opt for coir, vermiculite, or soil.
Soil, hemp mats and coco coir are compostable. However, some substrates are more environmentally friendly than others.
Coco coir is better than peat-based soil, which contributes to the destruction of non-renewable fragile ecosystems.
High-quality eco-friendly growing mediums
Coco coir utilises food waste by turning discarded coconut husks into a useful product.
At Coco & Coir we ensure the way we manufacture our coir-based products is eco-friendly from start to finish, creating the highest-quality soil substitute without depleting the planet’s resources.
If you’re growing in a small space and want to make use of the water-retentive, sterile properties offered by coco coir, check out our full range of products.
You can also take a look at our blog archive to learn more about using coco coir in your gardening projects.
Want a hassle-free way to raise microgreens?
Our Grow Your Own Microgreens Kit has everything any self-respecting foodie needs to give that extra flourish to a dish. You can grow microgreens and herbs in as little as 7 days! Each kit includes:
• A propagator, lid and tray
• 3 coir growing mats
• Pack of seeds to get your first crop going
• Full instructions
Our ready to use propagator and coco coir mat makes seeding and growing easy. Just a spray of water per day after setup.
Step-by-step instructions
1. Soak the mat in warm water in the tray
2. Soak large (3mm <) seeds in cold water for a few hours. Small seeds don’t need pre-soaking
3. Drain excess water from the tray. Leave mats in the tray.
4. Spread your seeds evenly across the wet mat. You don’t want them sitting on top of each other. But try to pack them in as tightly as possible to germinate the maximum number of seeds.
5. Add the propagator lid.
6. Place in a bright, ideally sunny spot. Our windowsill microgreen kit has been specifically made to fit windowsills.
7. Spray daily with cold water if required to keep the mat moist. But make sure the seeds aren’t sat in water.
8. At 3- 6cm tall harvest shoots with scissors. Rinse and use in your recipes.
Tips from the ‘Green Gardeners Guild’ online advice library
On the lookout for more tips and hints? Our blogs are packed with advice:
• Growing vegetables in pots
• How to start a vegetable patch
• Green Gardeners’ Guild Chat With: Life_on_the_lot
Are you munching through the microgreens?
Does a flourish of microgreens make your meals an Insta moment? Please tag us at @cocoandcoir on Instagram. We’ll credit you for any images we use and you’ll even get £10-worth of loyalty points for any of your stories we use!


